| Tip | ||
|---|---|---|
| ||
The system will reject any files larger than 100 MB during upload. You can get around that by uploading a zipped version of the file that then gets decompressed after upload. It is possible with some files (particularly text files) to substantially reduce their size by creating a zip file. See "Uploading a Set of Documents in a Folder or Set of Folders" below for instructions on how to do this. Note: There is no limit on the number of 100MB files you can upload at the same time - you could for example simultaneously upload multiple 100MB files on separate tabs in your browser. |
...
| Tip | ||
|---|---|---|
| ||
The upload options described below can also be used to upload audio, image and video files etc. |
| Table of Contents |
|---|
Manual Upload
Importing Single Documents
Step 1
Once you have imported your matters (aka actions) you will need to open each up each matter in turn, go to the documents tab and then add the documents to the matter.
Step 2
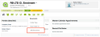
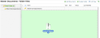
Then click on "Browse" as in the screenshot below to locate the file on your computer, and upload. It is only possible to add one document at a time using this method.
Importing Multiple Documents
You can drag-and-drop several documents into the matter by multi-selecting them before dragging. However you can only select files and not folders using this method (see the next section below for how to upload folders).
Step 1
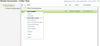
First go to Documents > Folder View in a matter as in the screenshot below.

Step 2
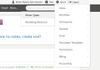
Unless you have downloaded a workflow app, or created your own workflow, it is likely you will see no folders. You may want to create a folder first for good house keeping. Just click "Create Folder" as in the screenshot below, name your folder and save. Then click on the new folder to open it. Alternatively you can just save documents to the Root Folder which you will see by default.
Step 3
Select the files in a folder on your computer which you wish to upload, and drag and drop them into the Actionstep folder. They will then automatically upload.
...
Uploading A Set of Documents in a Folder or Set of Folders
If you wish to import a whole set of documents that are contained in a directory structure then you can zip up the top-level folder and upload the zip file to the matter.
Step 1
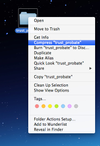
You can see how to do this on a Mac computer in the screenshot below.
Step 2
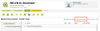
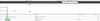
Then drag and drop the compressed zip file into the Actionstep folder as in the screenshot below.
Step 3
Then click on the icon beside the zip folder name, and choose "extract zip" as in the screenshot below.
When you unzip the file in the matter ActionStep will automatically create the folder structure contained in the zip file.
Uploading Document Templates
Document Automation Templates need to be uploaded to an action type in Admin.
Step 1
| Tip | ||
|---|---|---|
| ||
Admin > Workflow > Action Type |
Step 2
Select workflow and click on it as in the screenshot below
Step 3
Click on Doc Templates > New Template

Step 4
In the new screen, give the template a name, a description if you like, choose which folder it will be in by default (more on creating workflows here), and click on Please select a file to find and upload the document from your computer, then click save.
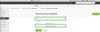
Templates that you upload to a workflow, will automatically be available to across the system in all matters. The document templates for the current matter selected will be displayed first, followed by the remaining workflows in alphabetical order together with the templates associated to those workflows. (Ie. in the screenshot below, a 'General Matter' workflow type has the 'General Matter' document templates displayed first, followed by the next workflow type in the system which is Activity - Seminar).
Bulk Document Import
If you have a large number of documents to upload across multiple actions then you may want to use our desktop upload tool. This requires a bit of setup. Essentially you need to map the local file path for each document to the action ID and folder of an actions that have already been created in Actionstep. You do this by creating a CSV file with the following columns:
| Column | Header | Data | Notes |
|---|---|---|---|
| A | action_id | Action ID | The unique numeric ID of an existing action (matter) in Actionstep |
| B | local | Source File Path on Windows | Example: C:\Clients\Jones\Eng_Agreement_Jones_Signed.docx (USE WINDOWS BACKSLASHES) |
| C | remote | Action Folder Path | Which folder in the specified action. Example: /Agreements/Engagement/Eng_Agreement_Jones_Signed.docx (USE UNIX FORWARD SLASHES) |
...