...
| Expand | ||
|---|---|---|
| ||
|

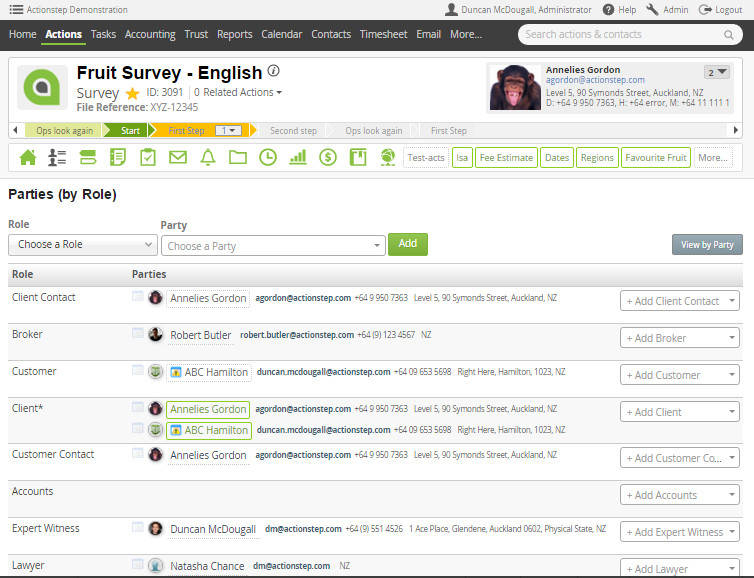
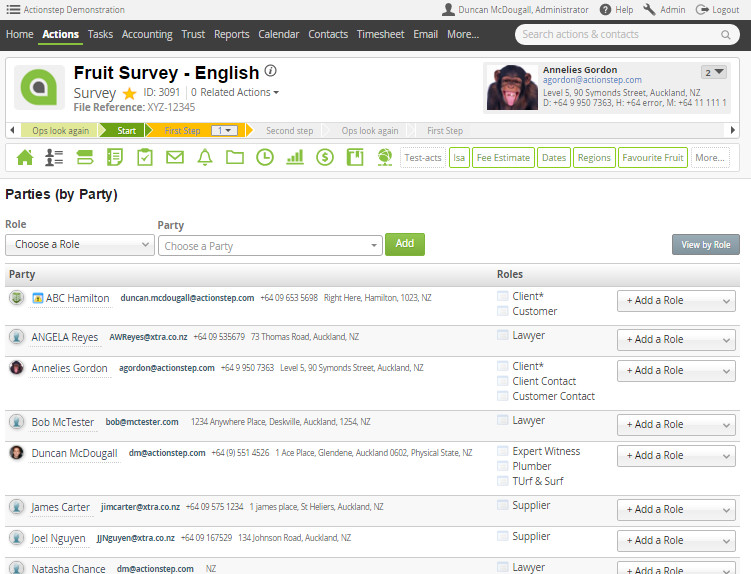
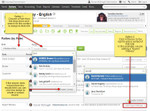
Parties by Party
...
| Expand | ||
|---|---|---|
| ||
|
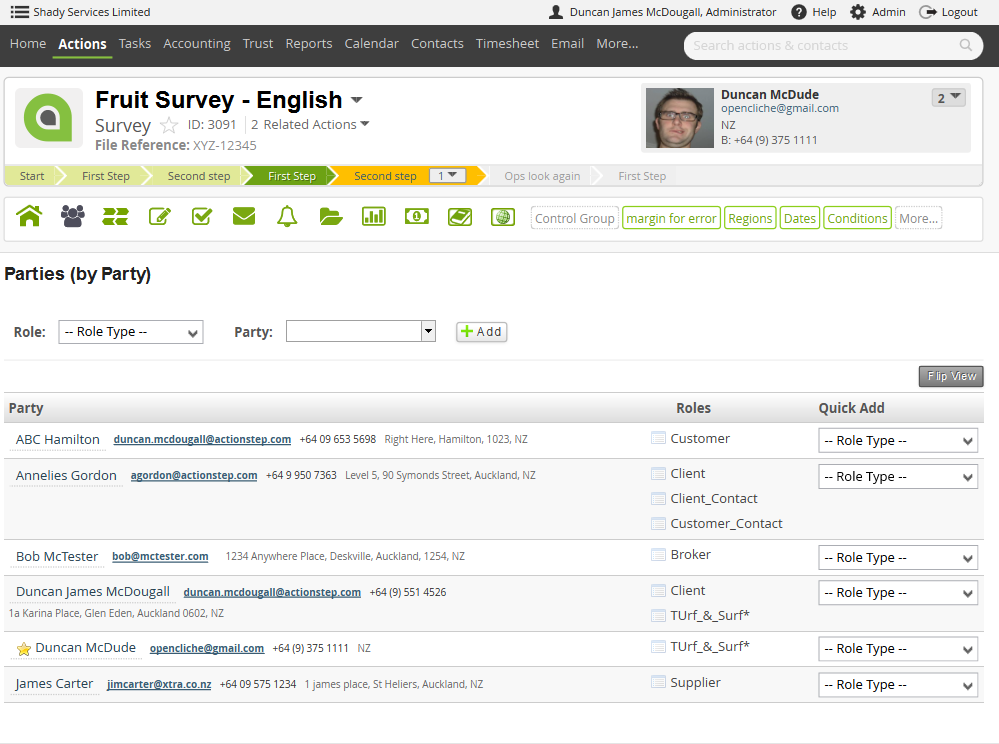
Adding in a new Contact
You can either use the add function at the top of the screen to select the role of the contact you are adding or you can type search for the contacts name or role in the Quick Add column beside the contacts or roles name.
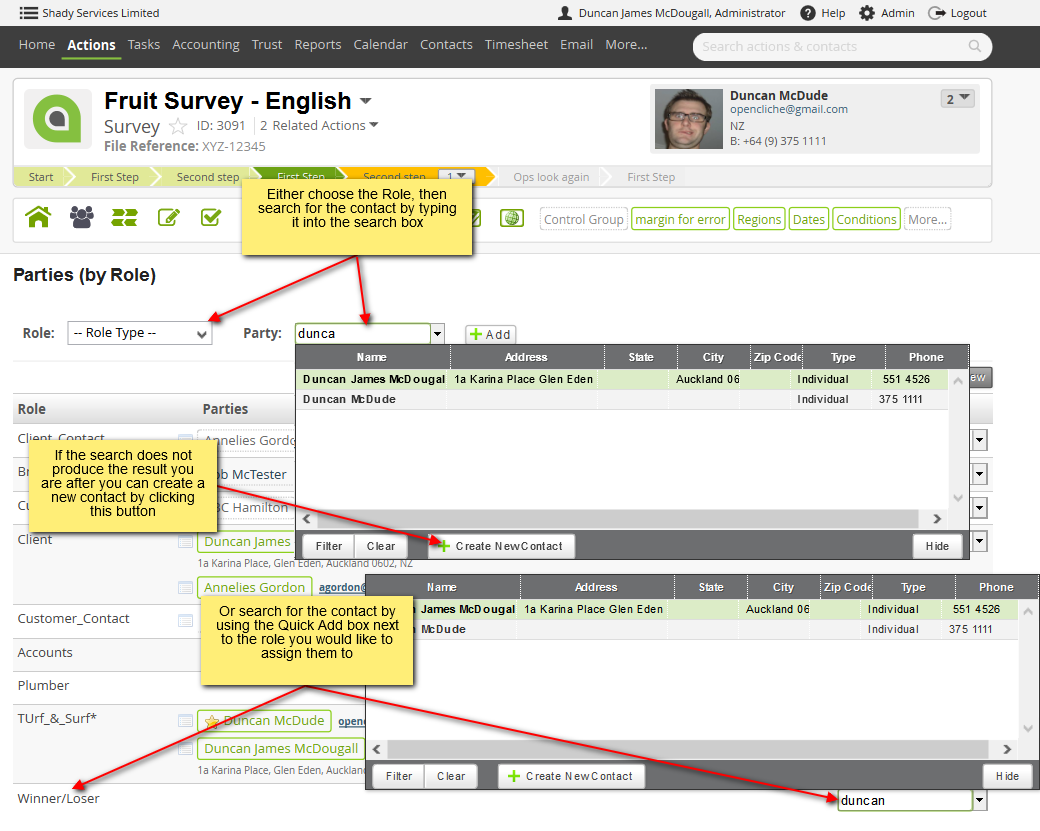
Click image to enlarge
Removing a Contact from an Action
Depending on whether you are looking at the Parties by Role screen or Parities by Party screen you will find a menu icon  beside with the role or contact name. Click on this to see the options of what you can do with this contact. One of the options will be Remove Party. Click on this to remove them as a contact under that role.
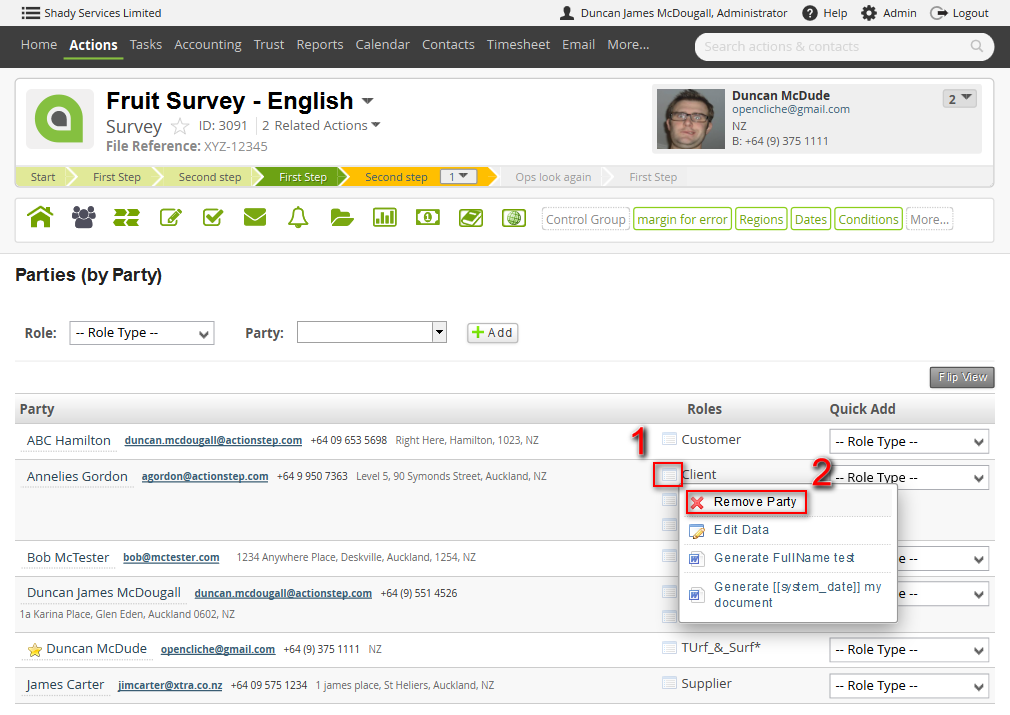
Click image to enlarge
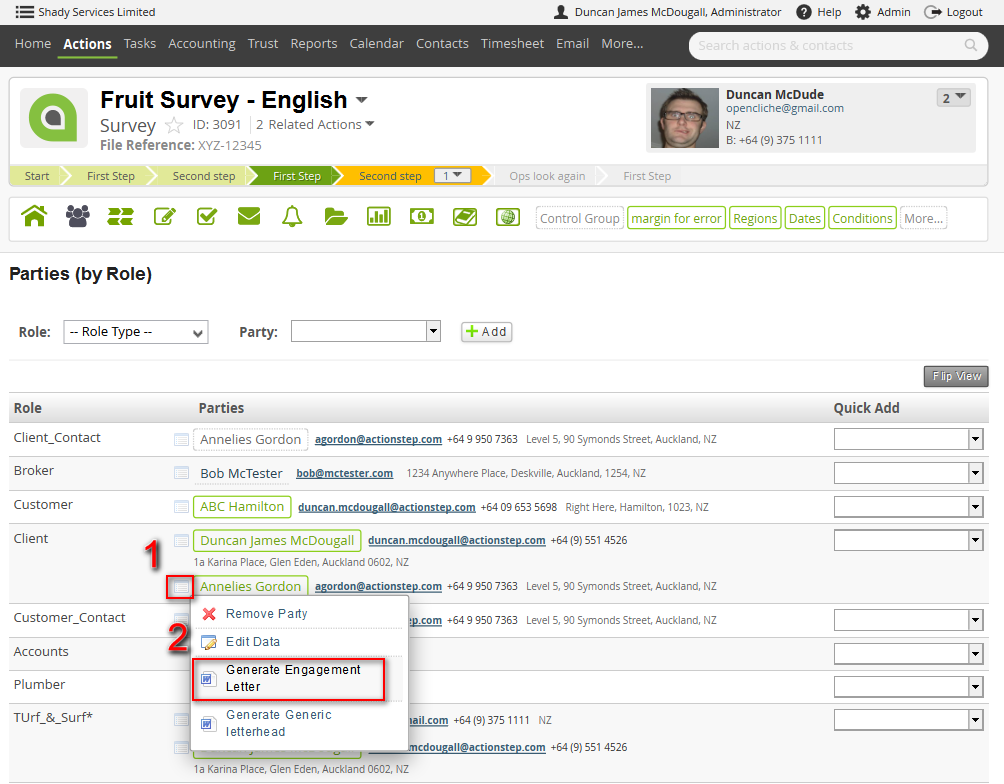
Features of the Parties Screens
...
At times you will want to create a document which will pull through the details of one particular contact only such as running a letter template. These can be run from this screen by clicking on the menu icon beside the contact's name (or the contacts role depending on which Parties screen you are on) then selecting the template that you are wanting to run. To learn more about how to setup templates so that you can create documents from the parties screen see: Linking Templates to Individual Parties
.png?version=1&modificationDate=1455238448490&cacheVersion=1&api=v2&width=150)
Click image to enlarge
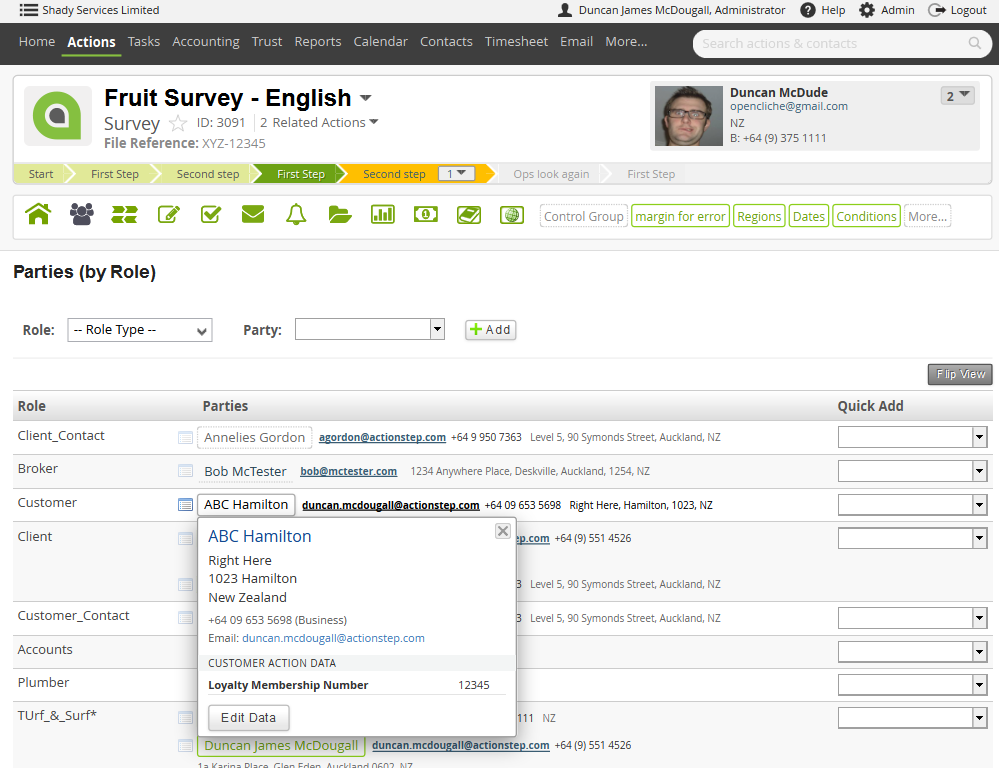
Further details of a contact
...
You can click the Edit button to be able to change this Custom Participant Data as it is saved against the Action.
Click image to enlarge
Being able to see if Custom Participant Data is loaded against a contact
...
See the image below for examples.
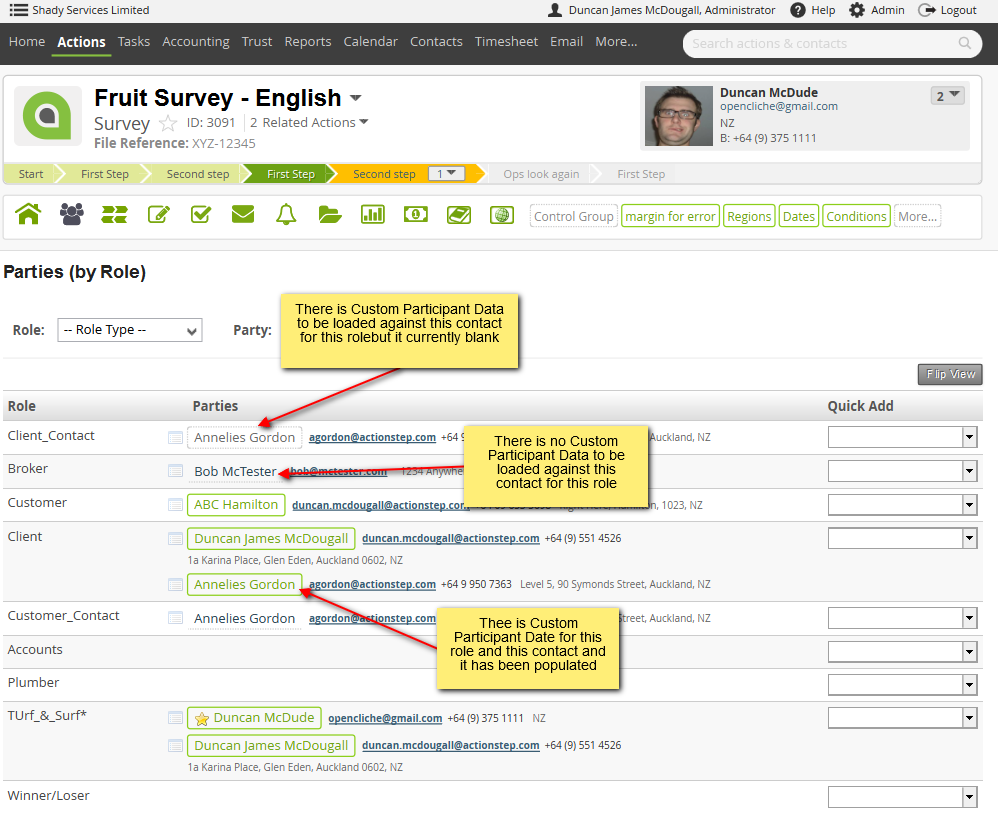
Click image to enlarge
| Note |
|---|
The custom data that will be shown will only be for the Participant Type (role) that the contact is currently assigned to. The contact might have custom data from another Participant type loaded but as it is not relevant to this role, it will not be displayed. The boxes to help you identify custom data are only available in the Parties By Role view. |
...
You can assign tags to help you identify important information about a client. These appear as icons next tot he contacts name. To learn more about how these work see our user guide here: Contact Tags.
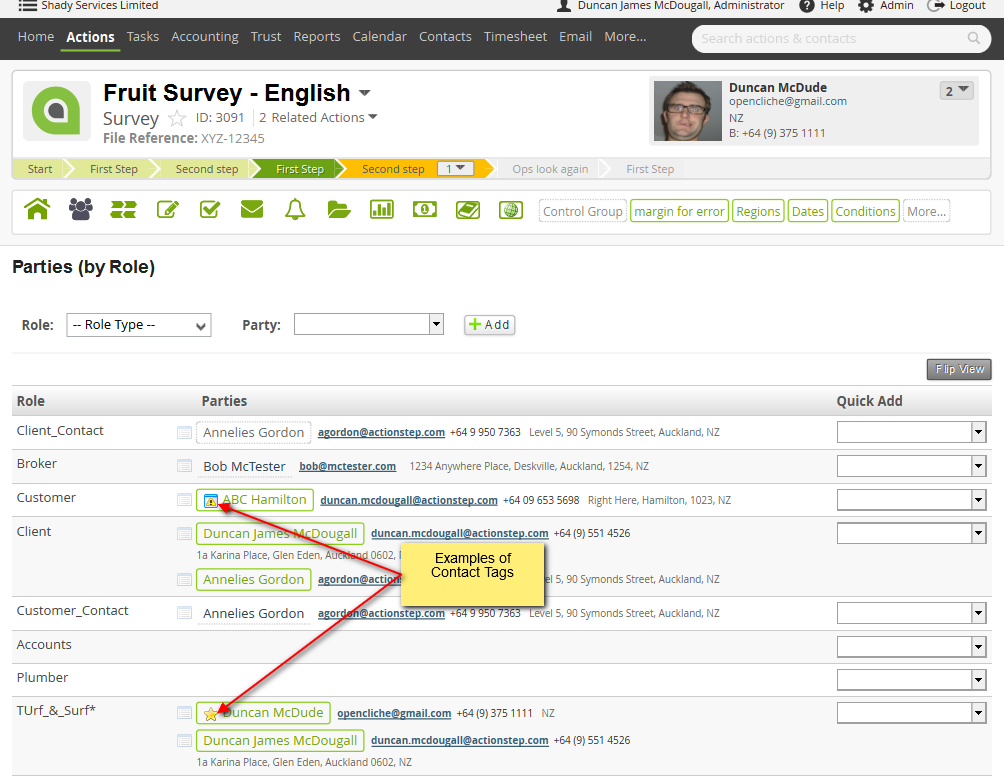

Click image above to enlarge for example of contact tags.
...