The import process consists of defining an import specification Before importing from a CSV file you need to tell Actionstep which columns in the CSV file map to data fields in Actionstep. You do this by setting up an "Import Specification" for each type of CSV filefile you want to import. Go to Admin > General > Import Data to view any existing import specifications and to add new ones.
| Tip | ||
|---|---|---|
| ||
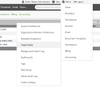
Admin > General > Import Data |
The first screen will show a list of any existing import specifications. Depending on your system there may already be some default specifications defined.

Each specification is of a certain Type and Class. The "Type" defines the general type of data, and the "Class" defines subsets of that data type. In most cases you will only need to concern yourself with the "Action" (matter) and "Participant" (contact) types.
To define a new specification click on "+New Spec" above the list.

Type a name for your new specification e.g. "Matters from old system", then select a Type and a corresponding Class. Be sure to select a class that starts with the same name as the Type.
Note for some classes you will be prompted to further qualify the data type. For example, if you are importing custom data elements then you will be prompted for the data collection name.
Leave the File-type, Status, and Footer line count as-is, click "Submit", and then click on the Match-Up button.

The ActionStep field names appear in the leftmost column and you should now specify how each of the required ActionStep fields will be populated by the import. Most fields will come from your CSV file so choose "File" as the "Match From" value and specify a column number in your CSV file that matches this field.
The "Match From" values have the following meaning:
- N/A – Ignore this field (it will not be imported)
- File – Match to a column in your CSV file
- User Entry – The importer will prompt the user for a value when importing
- Specific Value – A fixed value for all rows
Once you have completed the match-up, click on File Setup and specify any additional attributes of the CSV file.

In most cases you should accept the default values for Delimiter, String Enclosure, and Use Auto Line Detect. If your file has header rows above the data rows, then your can specify this in the Header Rows field.
You are now ready to import your file. Click on Import, confirm the import Type, select your specification, and choose the CSV file location.