| Table of Contents |
|---|
Introduction
In order to access ActionStep a contact record requires a Login record. Once a contact has a Login then that contact is also referred to as a "System User".
Step 1: Creating a Login
First create a contact record and make sure that you enter the correct email address for the person you want to create a login for.
| Tip | ||
|---|---|---|
| ||
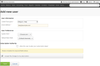
Contacts > Create Contact
select image to enlarge |
You can then "Invite" the person by clicking the Logins tab in their contact record which you will see immediately after saving the new contact record (as in the screenshot below).
![]()
select image to enlarge
...
| Widget Connector | ||
|---|---|---|
|
Step 2: Add New System User
You will then see the "Full System Logins List" page.
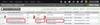
Click on "Add New System User" which will be on the right hand side of your screen as in the screenshot below.
![]()
select image to enlarge
You will be able to re-use an existing license or purchase a new license for the user.
Step 3: Select System Role
When creating a new login, you will need to select a 'system role.'
If you are setting up a new database, most users will find it easiest to use the 'administrator' system role to begin with. (For more information about creating more defined system roles go here).
Enter the name, email address, and select their system role from the drop down list and click Save (as in the screenshot below). The user will receive an email with instructions on how to set a password and access the system.
select image to enlarge
| Info |
|---|
When creating additional logins for the same participant, account authority needs to be set, otherwise the login under which the person creating the login is logged as will have its account authority revoked. |
Editing a Login
Step 1: Go to Admin>Permissions>Systems Users
Step 2: Then click on the login you want to edit, as per the screenshot below.

select image to enlarge
Step 3: This will take you to the 'Add new user" page, where you can then edit their information.
Reassigning Logins
The Reassign Logins tool can change the "assigned to" participant for an action (which also causes a file note to be created for that action), change assigned participants for unfinished tasks, and change the action participants.
Note: If changes need to be made for invoices or payments those would need to be completed manually.
...
select image to enlarge
...
You might need to do this because a staff member has left or you discover that you do not want a person to access your Actionstep Database anymore. You can access the logins list as per the instructions above.
From this screen click on either the name, the email address or billing reference of the person who you want to remove the login for.
select image to enlarge
Scroll to the bottom of the screen and you will see the Delete button.
From here there will be two more screens that you have to navigate through but both are self explanatory and should not cause any issues.
| Info | ||
|---|---|---|
| ||
Removing a user's login will remove that user's name from the list of visible time records on the Timesheet screen. This is because time entries can only be created for current users. Any time entries created before the user's login was removed will still be accessible from the timesheet summary screen and the matter billing screen. |
How are we billed for the users?
All of our billing is in advance for the subsequent month. Part charges will occur when you add a user during this period as the charge will take them to the end of the month to put them in line with your invoicing period. When a user is deleted there is no refund, if the user is replaced subsequently during the month it as taken as being paid by the deleted user. The billing day of the month that your system is on is determined by when you signed up - it's not always the calendar month.
Please note: Queries about invoicing should go to accounts@actionstep.com
| Info | ||
|---|---|---|
| ||
| Info | ||
See updated article in Actionstep Help Center: https://support.actionstep.com/hc/en-us/articles/360008510634-Adding-Removing-System-Users |