You can manage Articles from either the Action Type editor (Admin > Workflow > Action Types) or via the Wiki icon within a matter, provided you have the appropriate permissions. Both methods will get you to the same place.
When you create a new article you will see something like the screenshot below. Referring to the red numbers on the screenshot:

- Check this box if you would like this article to always appear in the Contextual view.
- Check this box if you would like this article to appear as a shortcut on the Wiki menu.
- Initially all documents are saved as "Draft". When you are finished with all your edits, you can then change the status to "Active" to allow users to see the article.
- Use the "Add Association" button to link this article to Steps, Tasks, and Custom Data fields. Note that you can either link the whole article or sections of the article.
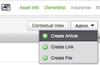
- Create your article by adding "Sections":
- Text Block: Text you type in
- Image Block: Images you upload
- File Block: File you upload
- Link Block: Links to external web resources or to files you have uploaded
| Note |
|---|
You can also embed images and web resources inside Text Blocks. |
Text Style
The Wiki text displays using a built-in style sheet. A simple mark-up language (called "Markdown") is used to set the style by placing special characters within the text. Links next to each text block provide examples on how to use Markdown, and there are also many web resources (Google "Markdown Syntax").
| Info |
|---|
For those of you who are familiar with HTML you can also include HTML tags to format the text. |