Our Web Form video mentions changes to the HTML that can be made in order to customize things like color, font, page splitting, etc. Since these changes would need to be made by someone with knowledge of HTML, advice on how to do this is not included within the scope of Actionstep support.
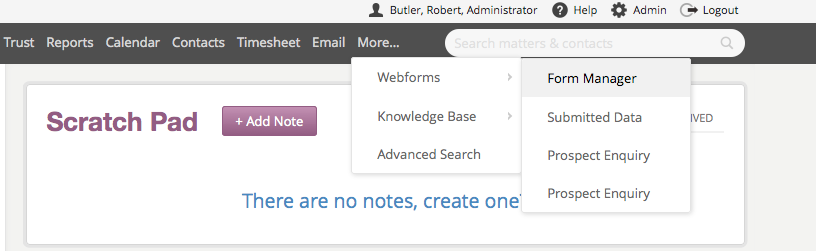
Go to
More > Webforms > Form Manager
If you don't see this option then you probably do not have the required permissions. Ask your Actionstep administrator for help if required.
Click on the New Webforms button to create a new webform.
The Form Manager is divided into three easy steps. On the first page choose a name for your web-form and select an action type to link it to. You can set the status to 'Active' or 'Inactive'. Only Active web forms will receive data from your website.
The "success" and "failure" URLs are pages that the user will see after submitting the data on your website. Under normal circumstances the visitors will see the "success" page, but if an error occurred then they will see the "failure" page. You can create your own success and failure pages and enter the URLs into this form, however Actionstep has some default pages pre-loaded for you.
Enter an email address of the person you wish to be notified each time a submission is received in the "Alert" field . This ensures that you will get notified of each submission even if you are not logged into Actionstep at the time.
Finally select one of the preset styles. If you want a custom style then you can modify the HTML later (or ask your web designer to do this for you).

On step two you enter the fields you wish to display on your form to the left of the screen. Choose the field in the Edit Field Screen then click save. you can then click the Add Field button towards the bottom right to add a second field. Repeat till you have populated the fields you want. You can select between contact fields (name, address, etc) and custom data collections that you may have defined for this action type.
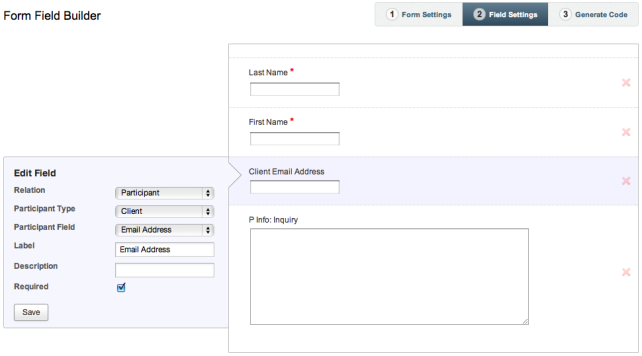
Once you have all the fields then click the box with 3 Generate Code in the top right. You then use this code for your webform on your own website.
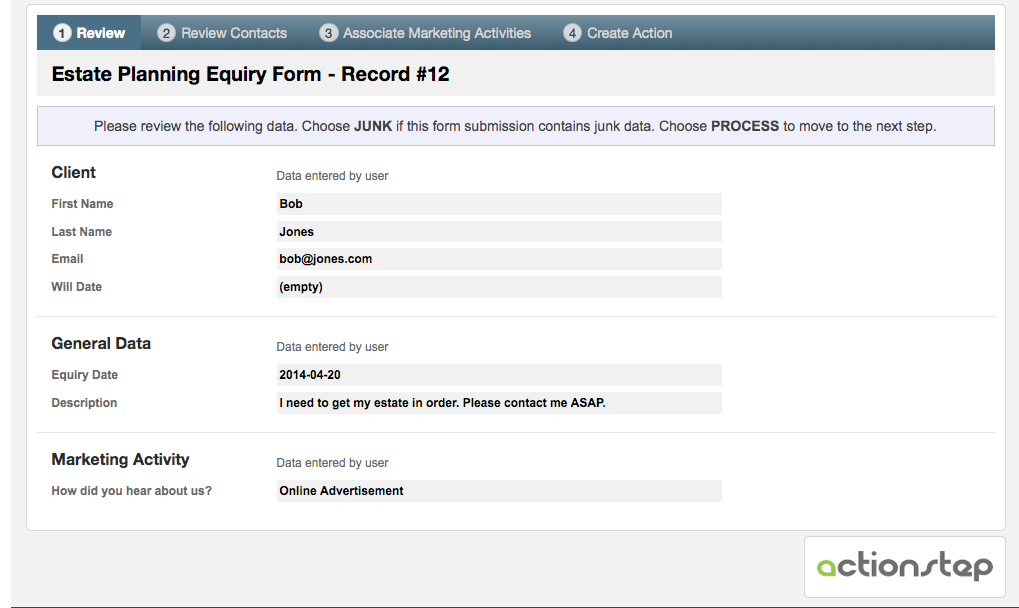
Tracking Marketing Activity
If the webform captures sales enquiry then you can add a field to capture the marketing activity.
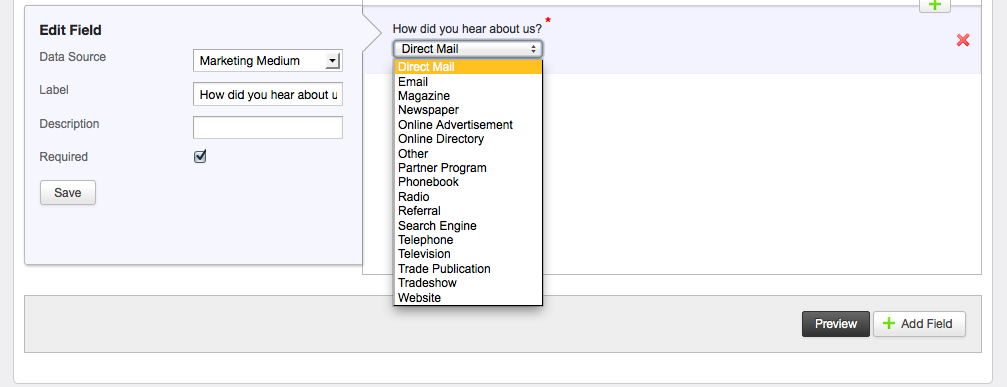
When the web form is submitted the Marketing Activity comes through as submitted data for review.