When to Credit
There are a number of different instances where you may be required to Credit your Client.
- The invoice you gave your client was disputed.
- Your Client may have paid you and the outcome of a case was that the other party must pay your costs.
- The Client has short paid and it's not worth chasing
- The Client has never paid and will never pay and thus the debt is written off.
Time Records
When crediting an invoice containing Time Records, the credit is not linked to the Time Records at all and will not affect any associated time reporting
Creating a Credit
Start with an Invoice
Actionstep does not allow the raising of a credit for a client where an invoice was never present. If you are not crediting an Open invoice, find a Closed invoice for the same Client (preferably the same Action). If you are new to Actionstep and this is historical, you may need to create an invoice to credit - this can be a $0.00 invoice.
In our example the invoice is for $3,266 and the client has paid $3,000. We will credit the remaining $266 and offset it against the invoice.
Open the invoice in question and clicking the Create Credit Button (highlighted in red in the screenshot below).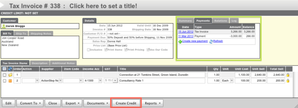
Clicking the Create Credit button will open up the Credit wizard. On the first screen of the Wizard, you can choose to apply the credit to just part of the invoice. So if you discussed a matter with a client and agreed to credit back the disbursements (for example) you could just highlight them here. Often it isn't to do with any particular item on the invoice so leave all ticked (or just one) and click the Next button.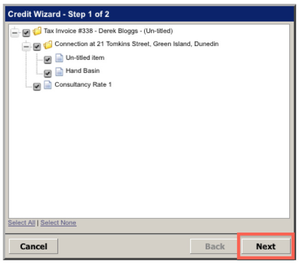
Enter the date that you would like the credit to take effect and give a detailed reason (ensure the Credit type is set to Sales Credit Invoice - which may be aliased in your system).
Click the Finish button.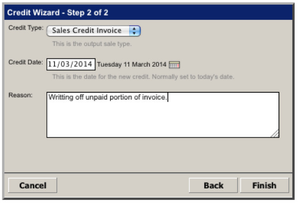
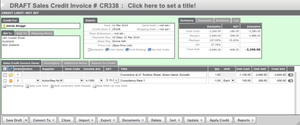
This produces the Credit
You will see that the total value of the selected items has been credited by default (highlighted in green below). We will need to change this so that only the outstanding amount is credited. To do this click on the Finish button.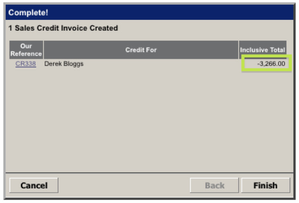
The Draft Sales Credit will appear and show the line items being fully credited back.
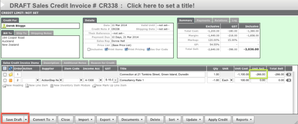
Adjust these to reflect the credit that you would like to apply. In the example we have zero'ed out the consultancy rate line item and reduced the -2,640.00 to -266.00 as per below. This was done by adjusting the Unit sell figure (highlighted below in green).
If you wish to change the account these entries are coded to, please do so in the underlying line items.
At this point if necessary, you are able to delete all the content and add just one line item with the correct detail.
Check the content and the value (depending on the tax settings you may need to make a change).
SAVE
After you have created the Credit you will want to Apply it. See: Paying and Allocating Credits
Complete the title
At the top of this screen is a field saying "Click here to set a title", by setting a title before you save - such as the reason for the Credit - you make it easy to look at a list of Credits and see what they were.