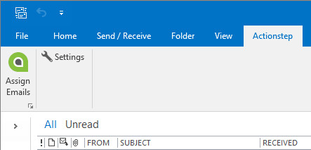
Assigning Email to Matters
Assigning one email at a time
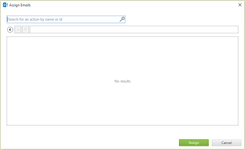
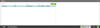
Start typing in the search box or click the Suggestions button to find a matter

Select a matter in the list and then click the Assign button. This stores the matter ID with the message in Outlook so that if you click on the message again it will automatically show the linked matter. Assigning the email to a matter uploads the message to Actionstep.
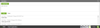
Details for the assigned matter will now be displayed.

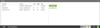
You will then be prompted to search for he matter that you would like to save the emails against in Actionstep.
Sending and Replying to Emails within Outlook
Emails can be assigned any time while composing and will upload automatically when the email is sent. They can also be assigned afterwards from the sent items folder.
Features
Copying Attachments to Document Folders
Once the email has been uploaded to Actionstep you can copy selected attachments to folders within the matter by clicking on the Document Icon in the Actionstep Outlook Panel.
Viewing Matter Participants (parties)
Click on the Parties icon inside the Actionstep Outlook panel. This will show you all parties linked to the matter in Actionstep.
Recording Time
Click on the Tasks icon inside the Actionstep Outlook panel. Then click on the New Task button as seen in the screenshot below.
This will bring up a pop-up window. The user can write a description, choose their rate sheets and record time.
(Note that all tasks scheduled in Actionstep against a matter will show up in this plugin as well. In the screenshot example above, there is one task named "Follow up." Clicking on "complete task" will bring up the same pop-up window below, from where the task can be completed).

File Notes
Click on the File Notes icon inside the Actionstep panel. A list of file notes for the associated matter is shown. The Create Note button allows you to add new file notes.
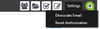
Settings
The settings menu allows you to reset the authorization of the plugin and dissociate emails that have been assigned to matters.
Email List View
You can add an Actionstep column to your list view in Outlook. This will show you whether an email has been assigned to a matter without having to open the message.
The "Assigned" column displays the id of the matter that an email has been assigned to. This can be added to the list view of a folder as follows:
- Right click on the column header row and select "View Settings".
- Click the "Columns" button.
- From the available columns drop down select "User Defined fields in folder".
- Select either "Assigned (Actionstep)" (which will display the Action ID #) or "ActionName" (which will display the case name) and click the "Add" button. If this column is not listed, click "New Column" and name the column "Assigned (Actionstep)" or "ActionName". The name must match this exactly or it will not display.
- Click "Ok" and close the settings window.